
<?xml version="1.0" encoding="utf-8"?>
<LinearLayout xmlns:android="http://schemas.android.com/apk/res/android"
    android:layout_width="fill_parent"
    android:layout_height="fill_parent"
    android:orientation="vertical" >
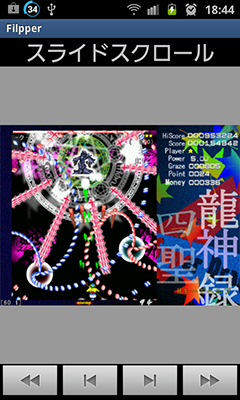
    <TextView
        android:layout_width="wrap_content"
        android:layout_height="wrap_content"
        android:layout_gravity="center"
        android:text="スライドスクロール"
        android:textSize="28sp" />
    <android.support.v4.view.ViewPager
        android:id="@+id/viewpager"
        android:layout_width="fill_parent"
        android:layout_height="fill_parent"
        android:layout_weight="1" />
    <LinearLayout
        android:layout_width="match_parent"
        android:layout_height="wrap_content"
        android:gravity="center" >
        <ImageButton
            android:id="@+id/btn_start"
            android:layout_width="wrap_content"
            android:layout_height="wrap_content"
            android:layout_weight="1"
            android:src="@android:drawable/ic_media_rew" />
        <ImageButton
            android:id="@+id/btn_prev"
            android:layout_width="wrap_content"
            android:layout_height="wrap_content"
            android:layout_weight="1"
            android:src="@android:drawable/ic_media_previous" />
        <ImageButton
            android:id="@+id/btn_next"
            android:layout_width="wrap_content"
            android:layout_height="wrap_content"
            android:layout_weight="1"
            android:src="@android:drawable/ic_media_next" />
        <ImageButton
            android:id="@+id/btn_end"
            android:layout_width="wrap_content"
            android:layout_height="wrap_content"
            android:layout_weight="1"
            android:src="@android:drawable/ic_media_ff" />
    </LinearLayout>
</LinearLayout>
<?xml version="1.0" encoding="utf-8"?>
<LinearLayout xmlns:android="http://schemas.android.com/apk/res/android"
    android:layout_width="fill_parent"
    android:layout_height="fill_parent" >

   <ImageView
        android:id="@+id/img_scroll"
        android:layout_width=  "fill_parent"
        android:layout_height="fill_parent" />
</LinearLayout>
public class CustomPagerAdapter extends PagerAdapter {
	public final static int N = 5;
	private LayoutInflater _inflater = null;

	public CustomPagerAdapter(Context c) {
		super();
		_inflater = (LayoutInflater) c
				.getSystemService(Context.LAYOUT_INFLATER_SERVICE);
	}

	@Override
	public Object instantiateItem(ViewGroup container, int position) {
		LinearLayout layout = (LinearLayout) _inflater.inflate(R.layout.page, null);
		int brt = 255*position/N;
		layout.setBackgroundColor(Color.rgb(brt,brt,brt));//適当に色をセット(しなくていい)
		ImageView img = (ImageView) layout.findViewById(R.id.img_scroll);
		int rsrc[] = { R.drawable.img00, R.drawable.img01, R.drawable.img02, R.drawable.img03, R.drawable.img04 };
		img.setImageResource(rsrc[position]);
		container.addView(layout);
		return layout;
	}

	@Override
	public void destroyItem(ViewGroup container, int position, Object object) {
		((ViewPager) container).removeView((View) object);
	}

	@Override
	public int getCount() {
		return N;
	}

	@Override
	public boolean isViewFromObject(View view, Object object) {
		return view.equals(object);
	}
}
public class PagerActivity extends Activity implements OnClickListener {

	private final int BTN_START = 0;
	private final int BTN_PREV = 1;
	private final int BTN_NEXT = 2;
	private final int BTN_END = 3;
	private ArrayList<ImageButton> _btnList = new ArrayList<ImageButton>();
	private ViewPager _viewPager = null;

	@Override
	public void onCreate(Bundle savedInstanceState) {
		super.onCreate(savedInstanceState);
		setContentView(R.layout.main);
		_btnList.add((ImageButton) findViewById(R.id.btn_start));
		_btnList.add((ImageButton) findViewById(R.id.btn_prev));
		_btnList.add((ImageButton) findViewById(R.id.btn_next));
		_btnList.add((ImageButton) findViewById(R.id.btn_end));
		for (ImageButton btn : _btnList) {
			btn.setOnClickListener(this);
		}

		_viewPager = (ViewPager) findViewById(R.id.viewpager);
		PagerAdapter mPagerAdapter = new CustomPagerAdapter(this);
		_viewPager.setAdapter(mPagerAdapter);
	}

	public void onClick(View v) {
		for (int i = 0; i < _btnList.size(); i++) {
			if (v != _btnList.get(i)) {
				continue;
			}
			switch (i) {
			case BTN_START:
				_viewPager.setCurrentItem(0);
				break;
			case BTN_PREV:
				_viewPager.arrowScroll(View.FOCUS_LEFT);
				break;
			case BTN_NEXT:
				_viewPager.arrowScroll(View.FOCUS_RIGHT);
				break;
			case BTN_END:
				_viewPager.setCurrentItem(CustomPagerAdapter.N - 1);
				break;
			}
		}
	}

}


Portions of this page are modifications
based on work created and shared by Google and used according to terms
described in the Creative Commons 3.0 Attribution License.
- Remical Soft -